
Article: An oil painting – in five stages
An oil painting – in five stages
The pictures below show my oil painting process in five stages starting with a few lines for placement, mapping in the big shapes, and then refining until the painting is complete.
STEP ONE: PLACEMENT AND DARKEST DARK/LIGHTEST LIGHT

In this oil painting, I wanted to showcase the middle birch tree by making it my center of interest. Also, I wanted to create a graceful composition and utilize a tight and moody color harmony. I also wanted to paint a large landscape focusing on the foreground. Note, this step does not solve technical problems (What shape? How light or dark? Soft, firm, hard or lost edge? Etc.), but it gets you started and guides you along the way.
I will be careful to reference this initial concept throughout the stages so that it’s importance is demonstrated.
Picture number one shows a toned canvas with a preliminary line drawing. This stage is vital because it determines the composition, so make sure everything fits! I also map out the structure of the trees and rocks. I used long straight lines on the left side because people tend to read paintings left to right. I use these lines to aggressively move the viewer’s eye toward my center of interest. I then guide the eye gently back around the bottom of the oil painting using my graceful curved lines. See how important these first lines are!
Finally, I establish my lightest light and darkest dark, which anchors my value range for the following stages of the oil painting.
STEP TWO: THE BLOCK-IN

I use this stage to establish my all-important value pattern (Where the big value shapes go) and color harmony. Don’t be deceived by the gusto. Accuracy is vital because this part of the foundation will govern the construction in every square inch of the painting. At this stage, the only colors used are Cobalt Blue, Yellow Ochre, Cadmium Red, and Titanium White. I used this limited pallet throughout most of the painting because it gave me those somber colors I was looking for. It also kept the painting very harmonious. Note, the color for the mountains and the leaves were both mixed with cobalt, yellow ochre, and white. I just used more blue for the mountains and more yellow ochre for the leaves.
STEP THREE: DO THE EASIEST THING FIRST

Somewhere between the block-in and this stage, my painting has burst into complexity! Individual leaves, twigs, trunks, bark all demand attention. My picture is on the verge of a visual riot. In response, I let the painting dictate the order of importance by painting the most straightforward passages first. For example, the branches around the bases of the trees were easy to see and understand, so I painted them first. Once I established them, getting all those individual leaves in the center of the painting was doable. Also, the mass of leaves on the right side proved more evident and distinct than the masses on the left. So, I painted the right side first, and that made analyzing the left manageable. Do you see how this works? The more simple accuracy established the more successful all of your efforts will be.
STEP FOUR: STAY FOCUSED!

At this stage of the painting, I know where I’m going. I have reached the tipping point, and I am just a few careful moves away from checkmate. I tend to let my guard down once I feel like the hard part is done, and that is always a mistake. Something my painting teacher, Brian Jekel, often said was, “The last strokes you paint are the first the viewer sees". With that in mind, I work toward a resolved finish.
As I arrange the rocks, I need to be careful not to let the viewer’s eye drift out of or get stuck in the lower right corner. I am looking for curved, flowing lines here. Also, notice the earthy yellows scattered throughout the birch uniting it from side to side? I need to introduce that color in the grass around the rocks to unify the painting.
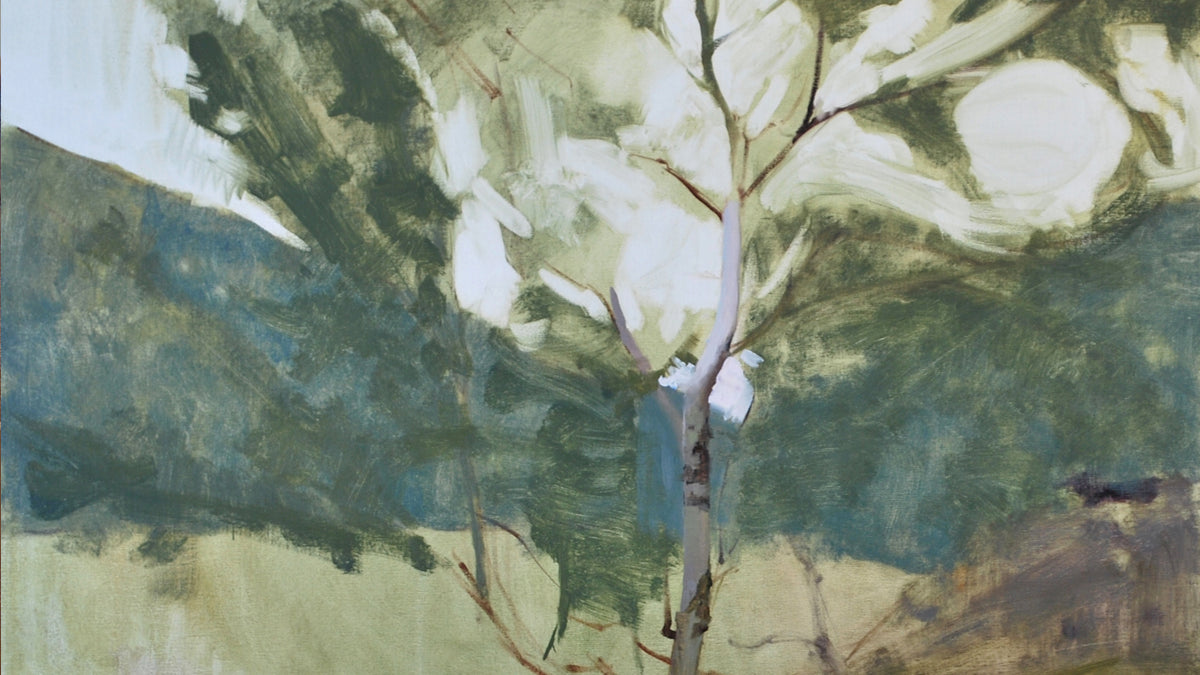
STEP FIVE: THE FINISH

While looking at the finished painting, let me restate my initial concept/reason for painting this piece.
In addition to showcasing the middle birch tree, I wanted to create a graceful composition and utilize a tight and moody color harmony. I also wanted to paint a large landscape focusing on the foreground rather than something in the distance.
I am my own harshest critic (I HOPE!), and I need to stay that way if I am to continue growing as an artist. So, let's start with the thing that bothers me most about the finished piece. The rocks that jut out into the lake on the left are stealing attention away from my center of interest - the birch tree. The painting has long since left my studio, but this sort of critical thinking will help in the creation of the next piece. If I still had the painting in the studio, I would lighten the darks in the rock and soften the edges. I think that would make it less distracting.
As for the rest, I am happy. My eye flows around my composition, and the color harmony is exactly what I wanted it to be!

The Birch Tree, Oil on Linen, 36 x 36 inches, In a Private Collection
Read more
PLEIN AIR PAINTING SUPPLY LIST
I packed this blog with as much plein air supply content as I can remember, but I am sure that I missed something. Your questions and comments are incredibly helpful! Please leave them in the comme...
Read more
1 comment
This is so beautiful, as a beginner painter your paintings are stunning and teachers ., thank you for all that you share.
Audrey Meuse
Leave a comment
This site is protected by hCaptcha and the hCaptcha Privacy Policy and Terms of Service apply.